
In That Time I Got Reincarnated as a Slime: ISEKAI Memories one of the important pieces of content in the game is Conquest. This is where you can farm special materials that are needed in order to make attribute specific equipment.These equipment raise your Attack and Defense along with your EP.
In order to complete Conquest you’ll want
- EP at 200k +
- Attribute Specific Units
- Unit that Stuns (Alice)
- Correct and Leveled Up Gear
- Know Certain Boss Mechanics
- Units that have Single Target Ultimates
If you can check off everything in the above then you’ll be able to clear the stages without a problem but checking off all of those things aren’t necessary in order to clear the stages.
For example if you use Alice and her stun you can clear the stages much earlier or if your EP is really high you can also clear without having to know mechanics or use stun.
Stun Tactic With Alice

This is a bit of a cheesy tactic where you try to stun the boss on certain turns so that they don’t do moves that either give them a big buff or do big damage. The game is made right now so that if the Boss does get stunned on that turn it completely skips what it was going to do that turn and moves on to the next.
The only character in the game that can stun right now is Alice Rondo [Golem Master] (3 star unit). Her stun has a 10% chance to work at level 1 and can go all the way up to 30% at max level.
What you do is switch Alice in to stun at key turns and then switch her out so you can deal big damage. Since the switching feature is very lenient and there is no downside you can do it as much as you want. It is advised you only try to stun at max twice since the cost gets high. One stun is usually enough to completely clear a stage if done right and you have decent units.
This strategy will let you clear Conquest way earlier than normal and with less EP as well. These are the best times to stun the Conquest bosses,
- Turn 1 for Ifrit
- Turn 2 for Charybdis
- Turn 2 for Soaring Winds
- Turn 6 for Colossus
- Turn 6 for Orc
- Turn 2 for Hinata
- Turn 1 for Milim
Flaming Domain Conquest Guide

Flaming Domain is where you will fight Ifrit. Ifrit is a Fire type boss and your best bet would be to use Water attribute characters. Ifrit is all about buffing himself up and trying to defeat you as fast as possible. If you can survive his early attacks you should be good.
Some units that would be good for this are Treyni (recovery), Rimuru Tempest (water units and heal), Gazel (high burst and single target damage), and Shuna Light (defense and changes orange to blue).
Ifrit Conquest Mechanics
- Turn 1 Ifrit increases ATK by 20%, Critical Rate by 100%, Secret Skill gauge by 100%
- Turn 2 Ifrit increases Secret Skill gauge by 100%, decreases your Soul of Secrets (orange) gauge and damage by 50%
- Turn 5 Ifrit lowers your magic attack resistance by 30%
- Turn 8 Ifrit gets Secret Skill
As you can see, Ifrit is one of the more annoying Conquest bosses to fight since he can use his Secret Skill (ultimate) on you twice in a row while buffing his attack and critical rate.
Fighting Ifrit
When fighting Ifrit without the stun tactic you’ll want to put your units that increase defense and can heal in the front and then switch them out to your heavy hitters after 2 of Ifrits ultimates which is around turn 3.
If you are using the Stun Tactic you’ll want to Stun Ifrit turn 1 so that it cannot buff up and you’ll be able to skip 1 ultimate attack from him. Without the ATK and critical rate buff he will be way more manageable and you’ll be ok till he uses his ultimate again.
Vortex Of Ruin Conquest Guide

Vortex of Ruin is where you will fight Charybdis. Charybdis is a Water type boss and your best option is to use Wind attribute characters. Charybdis is annoying since he uses tactics that try to stall you out and whittle you down bit by bit. He increases his own Defense and recovers HP all while hitting you with AoE attacks.
Charybdis Conquest Mechanics
- Turn 1 Charybdis will increase his Pierce Resistance by 30% and decrease your Soul of Skills (green) damage and gauge.
- Turn 2 Charybdis will buff up his DEF by 60% and Guard rate by 40%.
- Turn 3 Charybdis decreases your Water Resistance by 10%, Pierce Rate by 20%, increase own Water ATK by 10%
- Turn 6 Charybdis will unleash Secret Skill
- Turn 8 Charybdis will recover HP by 30% and increase super Guard Rate by 50%
As you can see from the skills that Charybdis uses, he likes to increase his Defense and Guard Rate making it really hard for you to deal meaningful damage to him until it wears off. If Guard is activated you’ll do 50% less damage. If Super Guard is activated, you’ll do 90% less damage.
Fighting Charybdis
If you are fighting Charybdis without the stun tactic you’ll want to do your own bit of stalling and building up your Secret Skills Ultimate for all of your characters. At turn 6 and 7 you’ll want to use all your buffs and Secret Skills since his defense buffs will be gone by then. Hopefully you’ll be able to finish him off here or he will recover and increase his defense again.
If you are using the Stun Tactic you’ll want to stun Charybdis on turn 2. This way he won’t be able to get off those annoying defense buffs and you can fight him normally. He isn’t a strong boss without those defense and guard buffs.
Soaring Winds Conquest Guide

Soaring Winds is where you will fight the Sky Dragon. The Sky Dragon is a Wind type boss and your best option is to use Space attribute characters. Sky Dragon focuses on using debuffs to defeat you. He will try to poison you a lot so if you have a character that can cause that to miss, you’ll want to bring them here. (e.g. Shion [Steel Annihilator])
Sky Dragon Conquest Mechanics
- Turn 1 Sky Dragon will try to Poison all your characters at a 75% chance, Decreases Soul of Secrets (orange) gauge and damage by 50%
- Turn 2 Sky Dragon decreases your ATK by 20% and increases his own Guard Rate by 40%
- Turn 4 Sky Dragon will try to Poison you again and does an AoE attack.
- Turn 6 Sky Dragon will use Secret Skill Ultimate and increase his own ATK by 10% while lowering your Wind Resistance by 10%
- Turn 8 Sky Dragon will recover HP by 15% and Stun all your units
Sky Dragon is pretty annoying with the Poison and lowering your ATK but he isn’t a very strong boss. You’ll definitely want to try to finish him off before turn 8 and he recovers HP while stunning you.
Fighting Sky Dragon
If you are fighting Sky Dragon without the Stun Tactic, you’ll want to use a unit’s skill to dodge poison on turn 1. From there, use skills to try and change your orange skills to anything else and you’ll be good.
If you are using the Stun Tactic you’ll want to Stun on turn 2. This is because you want to avoid having your ATK getting reduced and him getting his Guard Rate up. Guard Rate lowers your damage by 50% and that sucks on top of a 20% ATK decrease.
Unwavering Giant Conquest Guide

Unwavering Giant is where you will fight Elemental Colossus. Elemental Colossus is an Earth type boss so your best option is to use Fire type characters.Elemental Colossus heals its own HP while getting a big ATK buff so that it can take out all your units.
Elemental Colossus Conquest Mechanics
- Turn 1 Colossus will decrease Soul of Divine Protection (blue) gauge and Damage by 50%
- Turn 2 Colossus will increase own Critical Resistance by 20%
- Turn 4 Colossus will decrease Soul of Divine Protection gauge and Damage by 50%
- Turn 5 Colossus will increase own Critical Resistance by 20%
- Turn 6 Colossus will recover HP by 40% and increase P-ATK by 200%, Pierce Rate by 100%, Pierce Power by 200%
Elemental Colossus seems pretty tame but when he is able to reach turn 6 and get off all those buffs he becomes insanely strong and difficult to deal with.
Fighting Elemental Colossus
If you are fighting Colossus without the Stun Tactic, you’ll want to do your best to try and finish him off before turn 6. Because he doesn’t boost his DEF and Guard Rate you should be able to do this if you get lucky with your skills and orbs.
If you are using the Stun Tactic, you’ll want to Stun on turn 6. This will halt the HP recovery and massive ATK buff for a turn and allow you to finish him off.
Ruthless Paladin Conquest Guide
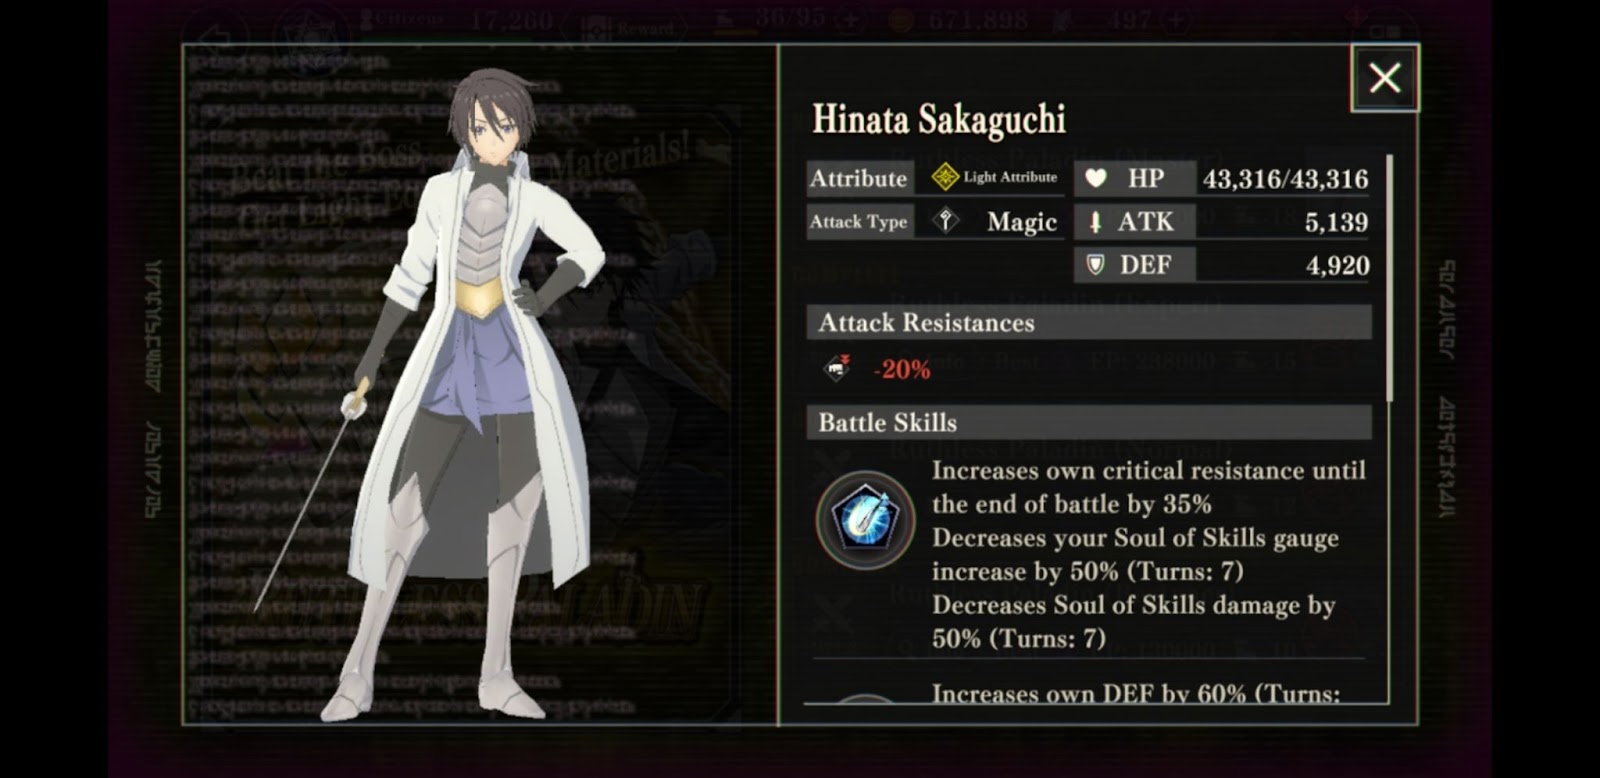
Ruthless Paladin is where you will fight Hinata Sakaguchi. Hinata Sakaguchi is a Light boss so your best option is to use Dark attribute characters. The first banners of the game were all Dark characters so if you have a lot of those, you’ll want to farm this one. Hinata Sakaguchi is annoying to fight because she likes to increase her Defense, Guard Rate, and Attribute Resistance.
Hinata Sakaguchi Conquest Mechanics
- Turn 1 Hinata will increase her Critical Resistance by 35% and decrease your Soul of Skills (green) gauge and Damage by 50%
- Turn 2 Hinata will increase her own DEF by 60% and Guard Rate by 40%
- Turn 3 Hinata will increase her own Light ATK by 20% and all Attribute Resistance by 15%
- Turn 6 Hinata will use Secret Skill Ultimate and recover HP by 15%
- Turn 7 Hinata will increase her own Light ATK by 20% and all Attribute Resistance by 15%
If you leave Hinata for too long she will keep increasing her ATK and Resistances till you can no longer defeat her. Her Defense buff lasts for 5 turns so you must make sure you can burst her once that is over.
Fighting Hinata Sakaguchi
If you aren’t using the Stun Tactic, you’ll want to go about the match normally but save your buffs and Secret Skill Ultimate for around turn 6 where she will no longer have her big DEF buffs.
If you are using the Stun Tactic, you’ll want to Stun her turn 2. If you are able to stun her turn 2 she will not be able to get that big Defense and Guard Rate buff. If Guard is activated you do 50% less damage and that just makes it so much harder to finish a boss off.
Ravenous Chaos Conquest Guide

Ravenous Chaos is where you will fight the Orc Disaster. Orc Disaster is a Dark type boss so you should bring Light attribute characters. Orc Disaster likes to decrease your stats while healing and increasing its own ATK. Typically want to finish him off before he can use his Secret Skill Ultimate.
Orc Disaster Conquest Mechanics
- Turn 1 Orc Disaster will decrease your Soul of Secrets (orange) gauge and Damage by 50%
- Turn 2 Orc Disaster will decrease your Pierce Rate by 20%
- Turn 3 Orc Disaster will do an AoE attack
- Turn 4 Orc Disaster will decrease your Soul of Secrets (orange) gauge and Damage by 50%
- Turn 5 Orc Disaster will decrease your Pierce Rate by 20%
- Turn 6 Orc Disaster will heal HP by 40%, increase own P-ATK and Dark ATK by 200%
- Turn 7 Orc Disaster will use Secret Skill Ultimate
When it comes to Orc Disaster the first turns aren’t too bad. If you can burst him and take him down before turn 6 that would be the best. Once he heals and gets that big ATK buff he will be so much harder to take down.
Fighting Orc Disaster
If you are fighting Orc Disaster without the Stun Tactic, you’ll want to keep trying until you get the best hand that allows you to burst him before he gets to turn 6. Gazel Dwargo [King of an Armed Nation] is great here since he gives himself massive buffs and deals big single target Light damage.
If you are using the Stun Tactic, you’ll want to Stun on turn 6. This way he won’t be able to recover HP and get that massive ATK buff. At this point you should be very close to taking him down and only need a bit more.
The Destroyer Conquest Guide

The Destroyer is where you will fight Milim. Milim is a Space type boss so your best option is to use Earth attribute characters. Milim’s playstyle is to buff up and just destroy you with her attacks and Counter.
Milim Conquest Mechanics
- Turn 1 Milim will increase her ATK by 70% and Pierce Rate by 80%
- Turn 2 Milim will decrease your Soul of Secrets (orange) gauge and Damage by 50%
- Turn 3 Miliim will increase her Pierce Power by 10%
- Turn 8 Milim will increase her own Space ATK by 10%
- Turn 9 Milim will have her Secret Skill Ultimate
Milim is a boss that is trying to destroy you as soon as possible. Turn 1 she will get a huge ATK and Pierce Rate buff that lasts for 5 turns. She does not get any Defense buffs so if you get good hands you can quickly defeat her.
Fighting Milim
If you are fighting Milim without using the Stun Tactic, you’ll want to use units that increase your Defense as soon as possible. A healer would also be useful since Milim hits incredibly hard and often. She also makes your orange skills not as effective so you want to have units that can change those. The good thing is that you can burst her quickly since she does not use any Defense or Recovery skills.
If you are using the Stun Tactic you’ll want to Stun her turn 1. It gets so much easier if you are able to stun her turn 1 because she will no longer have that insane ATK and Pierce Rate buff. The rest of the match is much easier and very doable.